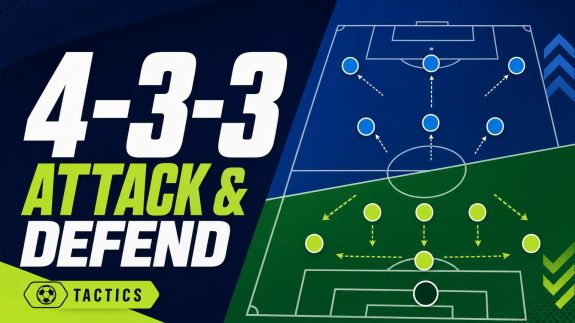
A formation is a starting map, not a freeze-frame.
Pause a match during an attack and a listed 4-2-3-1 may look like a 3-2-5: one full-back stays beside the centre-backs, the other pushes into the front line, and the number 10 joins the striker. With both full-backs advancing, the same side might resemble a 2-3-5 instead.
Top Free Bets for October
BetUS
200% up to $1,000
18+. Full T&C's apply. Sports bonus: 100% match up to $500. Casino bonus: 100% match up to $500. Enter promo code NEW200 at deposit and get up to a $1000 bonus. Valid on your first three (3) deposits. Available for all deposit methods. Minimum deposit of $50.
18+. Full terms apply. The Bet Back Bonus is available for new customers on first-time deposits of $50 or more. To redeem, select the offer in the cashier while completing your first deposit. Make your pick(s) in the Sportsbook and then select ‘Opt In to Use Your Bonus’. A Bet Back Bonus pop-up will display, select ‘Claim’ and then enter the risk amount to place your bet. If it wins, you keep your profits. If it loses, get 100% of your risk refunded as Free Play with only 1-time rollover. Free Play can then be used to place bets in the Sportsbook and earn cash. Additional T&Cs apply, please visit MyBookie to access the Help Center or contact Live Chat for more details.
18+. Full T&C's apply. This promotion is available only to new accounts in North America. Freeplay amount must be wagered five times (5x rollover) before it becomes eligible for withdrawal. Only prematch (sportsbook) bets count toward the 5x rollover requirement. Each person may claim only one bonus. If a customer creates multiple accounts to exploit this promotion, bet105 will mark all related accounts as ineligible and reclaim the funds. If a client receives more than two free bets without making a deposit, any winnings from those bets will be forfeited. This promotion applies only to the initial deposit or if specifically assigned by bet105.
18+. Full terms apply. New BUSR members only. Minimum deposit of $50 required per qualifying deposits. Codes 300SB1, 300SB2, and 300SB3 must be entered at the time of each corresponding deposit.
Each code is valid one time only. Each bonus code must be claimed at least 24 hours apart. Only one promo code may be applied per deposit. A 20x rollover requirement applies to the combined total of your initial deposit and bonus before any withdrawal can be made. Redeemable in the Sportsbook only. BUSR management reserves the right to modify, suspend, or cancel this promotion at any time. Redeem each promo code in the cashier to get your bonus. Must be 18 or older. Please gamble responsibly. General House Rules Apply.
18+. Full terms apply. 100% up to $500 Bonus. Valid for non-crypto payment methods only. Minimum deposit amount $50. This offer is not available to customers from Canada or Mexico. The bonus code must be redeemed immediately after the deposit and before a wager has been placed. The sum of the deposit and the bonus are subject to rollover requirements of 12x at min. odds of -200 (1.5) before a new code can be redeemed. Max. $500 of each bet count towards the rollover requirements. Only bets placed on options that take place count towards the rollover requirements. Wagers on Horse Racing and Boosted Odds do not count towards the rollover requirements. All general Everygame Sportsbook rules apply.
21+. Full T&C's apply. Bonus: 35% of qualifying deposit, up to $105. Rollover: 8× (only sports action counts towards the rollover) deposit + bonus. Expiry: 7 days after credit. Hold period: 2 weeks. Payouts allowed only after rollover and hold period are completed. Example: Deposit $200 → Receive $50 Sports Free Play. Sports Free Play Rules: see the BetAnything General Reward Rules for eligible sports, wager types, odds, and rollover rules.
18+. Full T&C's apply. This bonus can only be redeemed on your first deposit. Rollover is 5x Sports/5x Horses/30x Casino on both the initial deposit and the bonus amount. Rollover in our Sportsbook, for winning wagers, will be determined by the lesser of your risk or win amount at the time of wager settlement; for losing wagers your risk amount will be credited to your rollover contribution. Bonus funds cannot be used for play on Live Dealer games. Live Dealer play does not count toward meeting Casino rollover requirements for withdrawal. If a withdrawal is made before the bonus terms are met, all bonus funds as well as any money earned by wagering the bonus will be forfeited.
When possession is lost, the picture changes again. The number 10 may press alongside the striker in a 4-4-2, or drop behind the ball to create a 4-5-1. These are usually phase-specific structures, not automatic formation changes. The stronger clue is where players repeatedly return: two centre-backs, two full-backs, a midfield pair, three attacking midfielders and one striker.
The formation’s basic reference points
Four lines provide structure without dictating every movement.
A 4-2-3-1 is best read as a set of starting relationships, not ten fixed outfield coordinates. Its spacing makes sense only alongside wider football shapes, roles, and trade-offs: when one player advances, another usually protects the space left behind.
Back four: The centre-backs secure central areas and begin circulation. Full-backs provide width or move inside, but their freedom depends on the cover available.
Double pivot: The two deeper midfielders connect defence to attack, screen counters, and offer passing angles. One may hold while the other steps forward, or both may share those duties.
Attacking three: The number 10 operates between the lines, while the wide players stretch the pitch, drift inside, or run beyond. Their positioning often determines whether the team resembles a 4-3-3, 4-4-2, or 4-5-1.
Striker: The forward occupies centre-backs, links play, presses, and attacks the penalty area. A striker dropping short creates space only if a winger or midfielder threatens the gap.
These roles are interconnected. Aggressive full-backs can improve width but expose transitions; narrow wingers add central combinations but may crowd the number 10. The formation therefore describes a reference map, while the chosen roles determine how it actually behaves.
Building through the first press
A common starting picture is a 2-4 base: the two centre-backs form the first line, while both full-backs and both pivots occupy the next band. This gives several short passing options and leaves six players behind the attacking four, offering reasonable protection if possession is lost.
The spacing matters more than the numbers. One pivot can move slightly higher or wider while the other stays available behind an opponent’s first line. If the striker presses a centre-back, a pass into the free pivot—or through a full-back positioned outside the press—can move the ball into midfield without forcing a risky vertical pass.
An alternative is an improvised back three. A full-back may stay deeper beside the centre-backs, or a pivot may drop between or alongside them. The extra first-line player can create a three-against-two advantage, widen the opponent’s press, and open a lane into the remaining pivot or a dropping number 10.
Each version has a trade-off:
Full-back drops: stronger circulation and defensive cover, but less immediate width higher up.
Pivot drops: easier access around the press, but fewer central options beyond it.
Both pivots stay level: neat symmetry, but opponents may screen both with one compact pressing line.
The best build-ups are usually staggered rather than flat. Different heights and angles create a spare player while preserving cover behind the ball.
Availability beats proximity
A pivot can appear close to the ball yet remain unusable if marked from behind or hidden in a centre-back’s passing shadow. Small sideways or diagonal movements often create the needed lane.
Progressing through midfield
Staggered support and coordinated movement turn safe possession into forward access.
Staggered pivots give the centre-backs two passing options at different heights. One pivot may drop close to the ball while the other moves beyond the opposition’s first midfield line. This diagonal relationship is harder to screen than two midfielders standing side by side.
A simple pattern runs centre-back → near pivot → forward. As the pivot receives, the striker can check toward the ball and lay it off to the number ten or a winger moving inside. The pivot’s first pass need not break every line; it can draw pressure and prepare the next action.
Finding the third player
Third-player combinations help when the direct route is blocked. A centre-back passes into the pivot, who sets the ball first time to the number ten arriving in a half-space. Alternatively, the striker drops to bounce a pass into the path of a midfielder advancing from behind.
The number ten’s half-space movement is especially useful because it forces a choice: a central midfielder can follow and leave space inside, or a full-back can narrow and release the winger. These small rotations are central to creating useful positional overloads, often producing a free player between or outside the defensive lines.
If one side becomes crowded, a switch through the centre-backs or deeper pivot can exploit the weak side. The far winger should stay wide long enough to receive, while the nearby full-back and attacking midfielder offer forward and inside support. Effective progression therefore depends less on constant risk than on moving opponents before accelerating.
Final third
Forming the attacking five
Stretching the defence without losing control behind the ball
In settled possession, the 4-2-3-1 often places five players across the last line: two providing width, two occupying the half-spaces, and the striker staying central. The exact personnel can change. A winger may move inside while a full-back overlaps, or the winger may hold the touchline while the number 10 and an advancing midfielder fill the inside channels.
This spacing asks several questions at once. Wide players stretch the full-backs, half-space attackers threaten gaps beside the centre-backs, and the striker pins both central defenders by remaining ready for a run, cross, or cutback. If a defender steps out, space can open behind; if the back line stays narrow, a switch can release the far-side player.
Typical routes to goal include:
short combinations between a winger, half-space player, and overlapping full-back;
diagonal passes into the number 10 or striker’s feet;
switches toward an isolated wide player;
low crosses and cutbacks after reaching the byline.
The danger is committing too many players ahead of the ball. Usually, one pivot remains underneath the attack to collect clearances and slow counters. Behind that player, the centre-backs and a restrained or tucked-in full-back form a compact base—often resembling a 3-2 rest defence.
That balance matters as much as the attacking line itself. If both full-backs advance and both pivots enter the box, lost possession can expose the centre-backs to direct runs and wide counterattacks.
Defensive transition
The first seconds after losing the ball
Pressure the receiver—or protect the space behind
The first decision is whether to surround the ball or delay the counterattack. When several nearby players can close from different angles, counter-pressing immediately after possession is lost can trap the receiver before a forward pass develops. If the opponent has escaped facing forward, however, another rushed challenge may only open more space.
Each line contributes to closing the exits:
The striker and number 10 block backward and central passes, steering play toward one touchline.
The wingers press inward rather than chasing from behind, while also tracking runs into the channels.
The double pivot protects the centre. One midfielder may engage the ball; the other screens passes into the striker or attacking midfielder.
The back four hold enough depth to manage direct balls, stepping up only when pressure on the passer is secure.
Advanced full-backs make this choice more urgent. If one has joined the attack, the nearest pivot or winger should drop toward the vacated channel, while the closest centre-back shifts across without abandoning the middle. The far-side defenders then narrow to keep the line connected.
A successful reaction does not always win possession. Forcing a sideways pass, slowing the dribbler, or guiding play toward the touchline can provide the few seconds needed to rebuild the 4-2-3-1.
Without the ball
Defending at different heights
Small positional changes turn the 4-2-3-1 into two distinct defensive shapes.
Without the ball, the wingers usually retreat beside the double pivot, producing a 4-4-1-1. The number 10 stays close enough to the striker to screen passes into midfield and support pressure. If that player drops alongside the pivots instead, the shape becomes a narrower 4-5-1, with greater central protection but less immediate support for the striker.
High press
A high press commonly resembles 4-4-1-1. The striker directs play toward one side, the number 10 blocks the opposing pivot, and the near winger jumps to the full-back. This can trap short build-up, but a broken first line leaves a dangerous gap between the striker and midfield; direct passes can also expose the space behind an advancing full-back.
Mid-block
In a mid-block, the lines remain compact and pressure begins near halfway. The striker screens one centre-back or pivot while the midfield four shuffle across. The main weakness appears beside the pivots when a winger presses outward or one pivot steps forward: a half-space receiver can turn unless the full-back or centre-back follows.
Low block
Close to goal, 4-5-1 is often safer because the number 10 can reinforce central areas. The logic behind defending in a low block is to reduce space behind the back line and force attacks wide. However, repeated switches can isolate full-backs, while deep wingers may leave the lone striker detached. Whatever the height, the press works only when the front player’s movement triggers the lines behind.
Attacking after the regain
The first decision can turn recovery into a clear chance.
A regain often catches the opposition with full-backs advanced and midfielders facing the wrong way. The striker can sprint behind or pin a centre-back, while the wide runners attack the open channels. The far-side winger should advance immediately rather than drift toward the ball.
The number 10 becomes the key decision-maker and must read the space quickly:
Receive if a secure forward pass can connect the counter.
Carry if the central lane is open and defenders are retreating.
Release a runner when a winger or striker has gained separation.
Timing matters more than forcing a direct pass. A brief carry may draw a defender and improve the passing angle, but extra touches can allow the defensive block to recover.
If the counter is blocked, the double pivot provides a safer exit. One midfielder can offer behind the ball while the other moves into a different passing line, allowing possession to be recycled rather than surrendered. This reset lets the full-backs advance, restores width, and turns a rushed transition into a controlled attack.
Match-day check
Read the shape through its connections
Check the build-up exits
Effective circulation offers the centre-backs several angled passes; flat pivots, hidden full-backs, and isolated forwards signal trouble.
Watch midfield support
Progression works when the receiver has a nearby bounce option and a runner beyond; large gaps turn possession into hopeful passes.
Count the attacking lanes
Good occupation stretches the back line while keeping central presence. Crowding one side or leaving the striker alone makes attacks predictable.
Inspect the rest defence
Behind the ball, cover should protect central counters and full-back channels; scattered positioning leaves defenders chasing toward their own goal.
Read the defensive distances
Compact lines can press or delay together. If the ten, pivots, and back four move separately, opponents can play through the gaps.
Judge the first pass after regaining
A clear forward route invites transition; if it is blocked, a secure reset is usually healthier than forcing the break.
Conclusion
A functioning 4-2-3-1 rarely resembles four fixed lines for long. Its clearest signs are short supporting distances, useful angles, coordinated movement, and cover behind the attack; breakdowns appear when those relationships disappear.
Top Free Bets for October
BetUS
200% up to $1,000
18+. Full T&C's apply. Sports bonus: 100% match up to $500. Casino bonus: 100% match up to $500. Enter promo code NEW200 at deposit and get up to a $1000 bonus. Valid on your first three (3) deposits. Available for all deposit methods. Minimum deposit of $50.
18+. Full terms apply. The Bet Back Bonus is available for new customers on first-time deposits of $50 or more. To redeem, select the offer in the cashier while completing your first deposit. Make your pick(s) in the Sportsbook and then select ‘Opt In to Use Your Bonus’. A Bet Back Bonus pop-up will display, select ‘Claim’ and then enter the risk amount to place your bet. If it wins, you keep your profits. If it loses, get 100% of your risk refunded as Free Play with only 1-time rollover. Free Play can then be used to place bets in the Sportsbook and earn cash. Additional T&Cs apply, please visit MyBookie to access the Help Center or contact Live Chat for more details.
18+. Full T&C's apply. This promotion is available only to new accounts in North America. Freeplay amount must be wagered five times (5x rollover) before it becomes eligible for withdrawal. Only prematch (sportsbook) bets count toward the 5x rollover requirement. Each person may claim only one bonus. If a customer creates multiple accounts to exploit this promotion, bet105 will mark all related accounts as ineligible and reclaim the funds. If a client receives more than two free bets without making a deposit, any winnings from those bets will be forfeited. This promotion applies only to the initial deposit or if specifically assigned by bet105.
18+. Full terms apply. New BUSR members only. Minimum deposit of $50 required per qualifying deposits. Codes 300SB1, 300SB2, and 300SB3 must be entered at the time of each corresponding deposit.
Each code is valid one time only. Each bonus code must be claimed at least 24 hours apart. Only one promo code may be applied per deposit. A 20x rollover requirement applies to the combined total of your initial deposit and bonus before any withdrawal can be made. Redeemable in the Sportsbook only. BUSR management reserves the right to modify, suspend, or cancel this promotion at any time. Redeem each promo code in the cashier to get your bonus. Must be 18 or older. Please gamble responsibly. General House Rules Apply.
18+. Full terms apply. 100% up to $500 Bonus. Valid for non-crypto payment methods only. Minimum deposit amount $50. This offer is not available to customers from Canada or Mexico. The bonus code must be redeemed immediately after the deposit and before a wager has been placed. The sum of the deposit and the bonus are subject to rollover requirements of 12x at min. odds of -200 (1.5) before a new code can be redeemed. Max. $500 of each bet count towards the rollover requirements. Only bets placed on options that take place count towards the rollover requirements. Wagers on Horse Racing and Boosted Odds do not count towards the rollover requirements. All general Everygame Sportsbook rules apply.
21+. Full T&C's apply. Bonus: 35% of qualifying deposit, up to $105. Rollover: 8× (only sports action counts towards the rollover) deposit + bonus. Expiry: 7 days after credit. Hold period: 2 weeks. Payouts allowed only after rollover and hold period are completed. Example: Deposit $200 → Receive $50 Sports Free Play. Sports Free Play Rules: see the BetAnything General Reward Rules for eligible sports, wager types, odds, and rollover rules.
18+. Full T&C's apply. This bonus can only be redeemed on your first deposit. Rollover is 5x Sports/5x Horses/30x Casino on both the initial deposit and the bonus amount. Rollover in our Sportsbook, for winning wagers, will be determined by the lesser of your risk or win amount at the time of wager settlement; for losing wagers your risk amount will be credited to your rollover contribution. Bonus funds cannot be used for play on Live Dealer games. Live Dealer play does not count toward meeting Casino rollover requirements for withdrawal. If a withdrawal is made before the bonus terms are met, all bonus funds as well as any money earned by wagering the bonus will be forfeited.
Hi I'm Andy and I love to report on the latest football scores and Tables. I also like to have a bet on the football and occasionaly on the horses. On this website I have new bookmaker offers listed that will give you free bets and bonuses to help you beat the bookies. Enjoy your stay.